A Slice of Memories
One of my husband Howard’s best memories is living around the corner from the Gourmet Ghetto in Berkeley, California back in the eighties. The primary fixture in that food lovers’ neighborhood was (and still is) The Cheese Board, a cheese store/bakery cooperative that sells an amazing array of cheese and bakes fabulous breads and pastries. Howard’s favorite thing to come out of the bakery was the cheese bread. Whenever we pass through the area, we stop for a fix of cheese bread and cheese.
Because we live on the East Coast, stopping by The Cheese Board isn’t a frequent occurrence. To satisfy the cheese bread craving, I’ve come up with a homemade version that Howard says comes close to what he remembers. It’s easy enough that I try to make at least once a month.
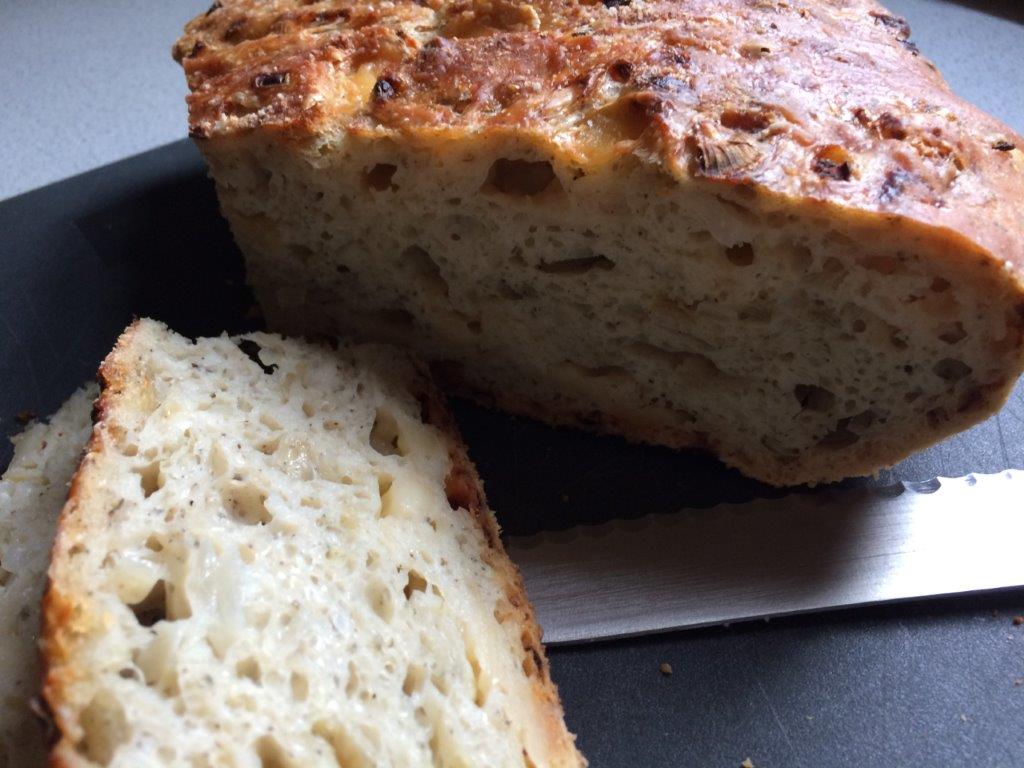
This time of year, slices of cheese bread are the perfect accompaniment to a bowl of soup for lunch or dinner. The crusty outside, speckled with flecks of almost-burnt cheese, contrasts with the soft inside, studded with more pockets of tangy cheese. The floral aroma of marjoram adds a lovely savory element.
Give it a try. If you ever visited Berkeley, you might be transported. If you didn’t, I still guarantee you a bread you’ll want to eat again and again.
No-Knead Cheese Bread, inspired by the Cheese Board in Berkeley
Adapted from Jim Lahey’s No Knead Bread and The Cheese Board’s cookbook.
(Note that I use a scale, but I’ve included approximate volume measurements.)
400 g (about 3 cups) bread flour
½ – 1 tsp fine sea salt (depending on how salty the cheese is)
¾ tsp yeast
2 tsp dried marjoram
½ tsp freshly ground black pepper
1 onion, diced
200g Asiago cheese, diced into ½-inch pieces
About 360 g (about 1-5/8 cups) water
2 Tbsp sesame seeds (to top the loaf before baking)
In a large bowl, whisk together the flour, yeast, salt, marjoram, and pepper. Add onion and cheese and stir to evenly distribute them throughout the dry mixture.
Slowly add water, stirring to combine, until you have a fairly wet dough where all the water is incorporated. You might not need all the water, or you might need a little more. I stir in about half of the water, then another half of what’s left, then judge how much more I need.
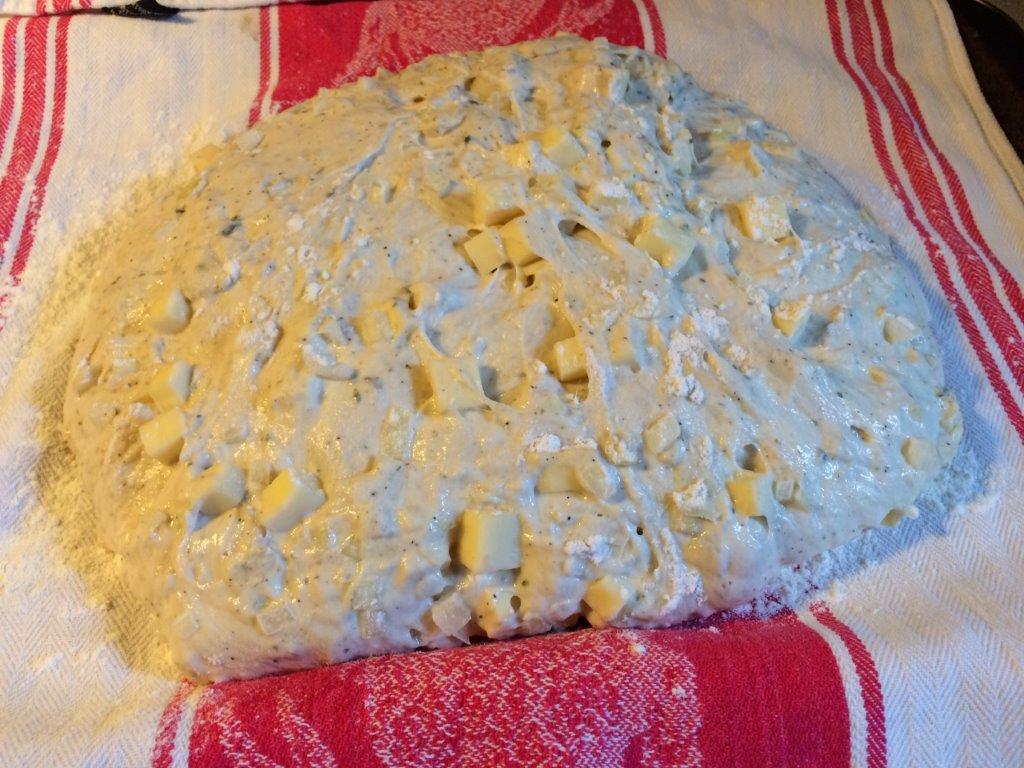
If the bowl is really sticky, transfer to a clean bowl. Cover the bowl with a clean dish towel and set in a draft-free spot. (I sometimes use my microwave or the oven.) Let it rise 12-18 hours. It can go a little longer if that suits your schedule better. The dough will rise, get bubbly, and remain very sticky.

After the dough has risen, generously sprinkle the counter with flour. Also, lay a dish towel (I use the same one that was covering the bowl) across a baking sheet with the ends hanging off the sides. Sprinkle the center of the towel with corn meal or more flour and gently rub it into the towel.
Turn the dough out onto the floured surface. Flour your hands, then make two folds. First, fold the left and right sides towards the center. Then fold the top and bottom towards the center. The folding action is similar to folding a letter to put in an envelope.
Transfer the dough, seam side up, on to the dish towel. Fold the ends of the dish towel over the dough to cover it. Set it aside to rise for another 1 to 2 hours.
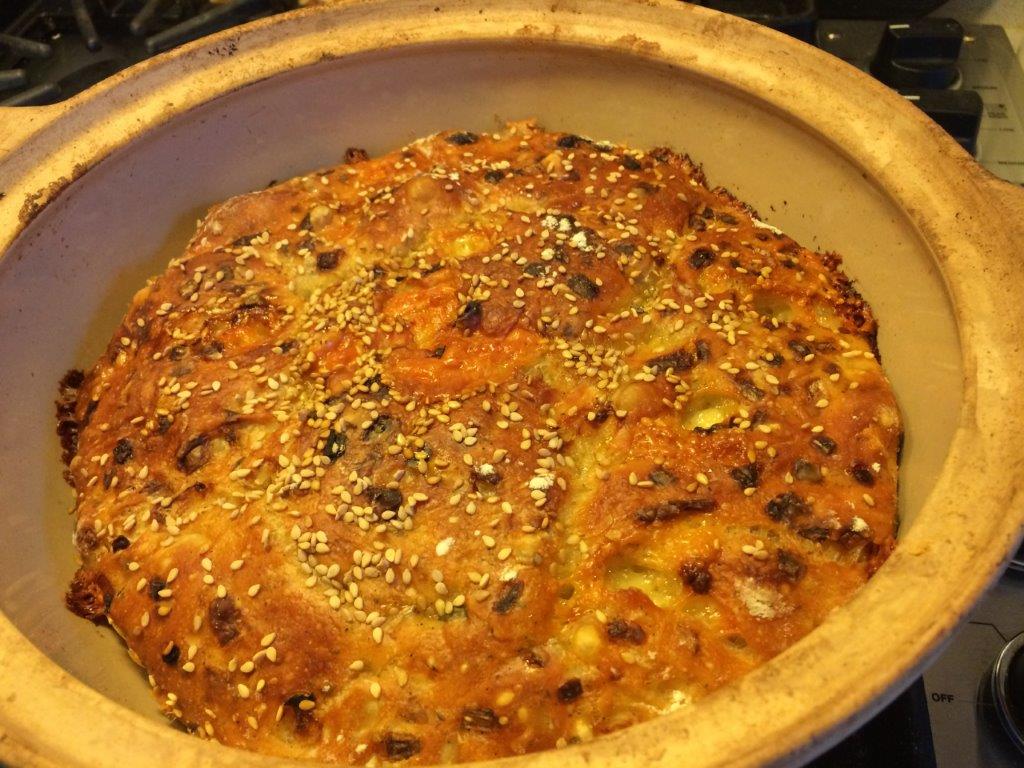
Thirty minutes before the end of the rising period, place a large and heavy covered Dutch oven or bread dome or cloche (I use this one) into the oven, and preheat to 475F. After 30 minutes, carefully remove the hot vessel from the oven and transfer the dough to the pot, keeping the seam side up. If the dough doesn’t land neatly, using potholders, shake the pot to even it out. Sprinkle the sesame seeds on top.
Replace the cover and put the pot back in the oven for 30 minutes, then remove the lid and bake for another 20-30 minutes, until very brown. You don’t want it to burn, but the longer you go, the crisper the crust will be.
Transfer the loaf to a rack to cool. You should hear it singing as it cools.
p.s. Now that I feel like I have my feet under me in 2016, I’m aiming to share one non-cooking-club-related post with you every week. Let’s see how I do!

Posted on 3 February 2016, in Baking, Cheese and tagged Berkeley, bread, cheese, The Cheese Board Collective. Bookmark the permalink. 7 Comments.

It looks delicious! Here’s to having your feet back!
Looks fabulous and what a wonderful food memory tribute!
Betsy, your bread looks just wonderful! I am beginning to think that the trick to these is to bake them in a pot. But after 2 other cliches, I’m a little wary. But this one looks like it would work and obviously does for you! Is it what you use for all of you no-knead breads?
The cheese version looks amazing!!!
I use the bread dome for all my no-knead breads. And I’m hooked on no-knead bread. I made plain, whole-wheat, rye, and cheese, rotating through.
Hi. Looks delicious. Almost makes me want to try it. Ha, ha. Xoxoxo
Sent from my iPad
>
It’s fun trying to recreate food memories!
That sounds wonderful! I’ve been reading about no knead bread lately. I love the whole process of traditional bread-making, but an easy method that produces these sorts of results is pretty tempting.