Blog Archives
It’s Here! Summer 2016 CSA Week 1
For two summers, we had a CSA share which filled our bellies with both delicious produce for 20 weeks and dread about making the most of summer’s bounty without waste. The challenge was fun, but exhausting. Last year, we took a break. However, I have to admit that I felt a little left out. Every week, I volunteered for half a day in the fields at Lexington Community Farm and published a newsletter for the shareholders to help them make the most of that week’s share. While I could (and did) shop in the farm stand, I felt left out of the enthusiastic banter of the CSA shareholders. So after a one-year hiatus, I decided to jump back into the summer CSA fray.
Fortunately, this year Lexington Community Farm offers a 10-week share, where the pickup is every other week throughout the full season. I’m hoping this option will relieve the flow of food and the pressure I felt as abundant produce seemed to multiply in the kitchen.
I’ve handed off the weekly newsletter to someone else, but the question of how to best enjoy the week’s offering is still a puzzle I enjoy solving. As I work it out, I’ll share the result with you. For the first week, here goes!
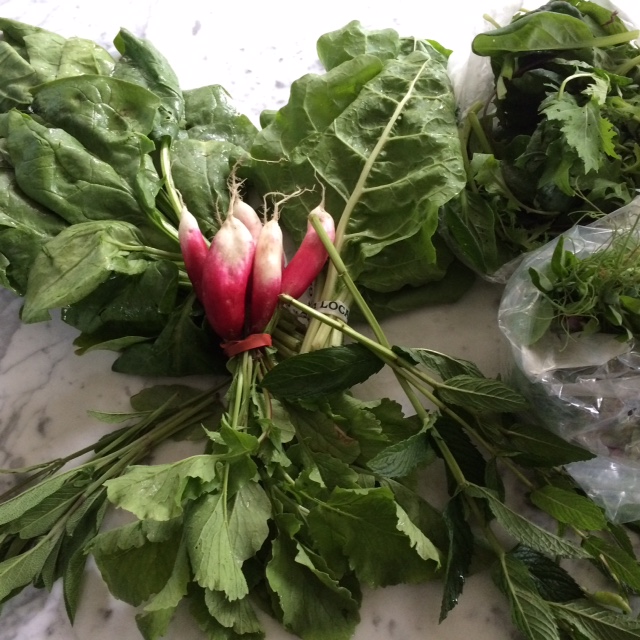
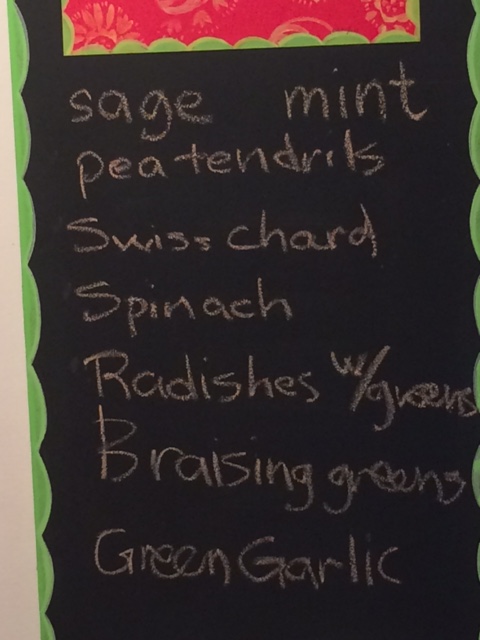 Week #1 Share Contents:
- Swiss chard
- Spinach
- Braising Mix
- Radishes (with greens)
- Pea Tendrils
- Mint
- Sage
- Green Garlic (purchased)
Storage Tips
The first task on arriving home is to access what needs to be eaten first and how to store what I won’t get to until tomorrow (or later). I’ve had good luck wrapping greens in a paper towel (dry if the greens are somewhat wet or damp if they are dry) and stowing them in a large plastic bag or a large airtight container. As long as they aren’t too wet, greens can last up to a week or so this way.
I’m big on using the “bonus” vegetables, the parts that many people discard or compost. This week, I consider the radish greens as a bonus. Not sure how I’ll use them, I cut them off the radishes, wrap them in a paper towel and store them with the other greens.
I find that fresh herbs last longer in “vases” of water instead of plastic bags. As with cut flowers, trim a little bit off the base of the stem and place them in water. My assortment of small pitchers gets extra time outside the cabinet, and with the herbs visible on the counter, I remember to use them.
What to Eat
The first week’s share was on the small side, so we polished it off within a few days. That means I’m writing this in retrospect, sharing what I made not what I’m planning.
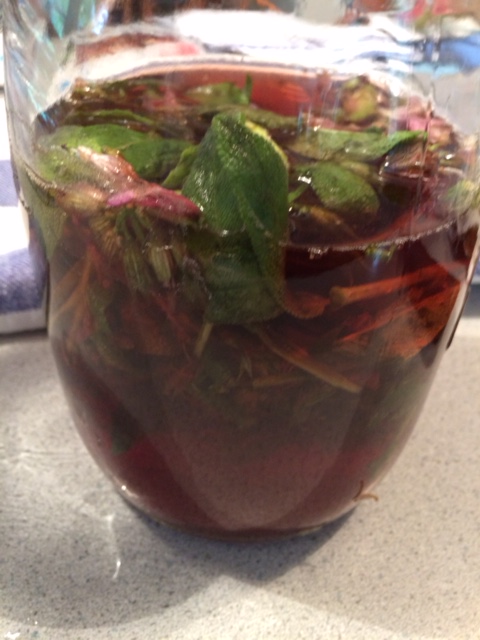
Sage: In addition to the sprigs of sage in my share, the sage plant in my backyard herb garden was flowering. With a plentiful amount of fresh sage ready to go, rather than add it to the week’s meals, I decided to infuse the sage in red wine vinegar for a flavored vinegar to use later.
Mint: A few sprigs of mint cried out to be muddled into mojitos for Friday-night start-of-the-weekend cocktails.

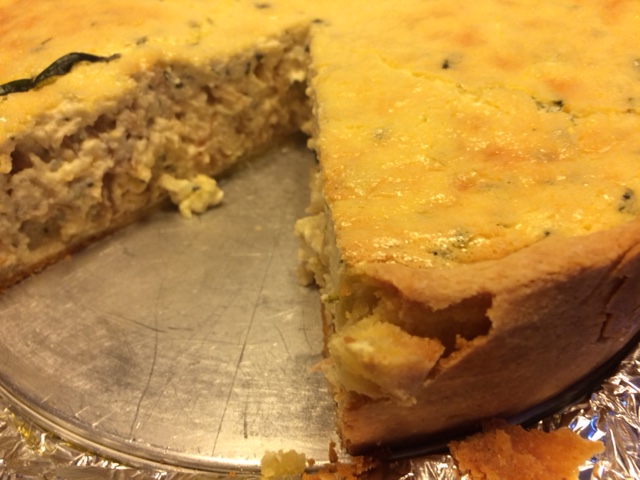
Greens always surprise me when they cook down from generous bunches to just a handful. I combined this week’s spinach, Swiss chard, and radish greens to make a mixed greens quiche, one of my favorite ways to eat cooked greens. Quiche is one of those flexible recipes that can be varied to different fillings, seasonings, and cheeses. For this week’s version, I sliced one stalk of green garlic and added some crumbled blue cheese. I also experimented with the pastry crust, adding some stone-ground cornmeal for some added texture.

Pea tendrils (also known as pea shoots) can be eaten raw, wilted, or thoroughly sautéed. I made a simple salad with pea tendrils and sliced radishes tossed with a mustardy tarragon dressing. (The tarragon came from my own herb garden.)

The braising mix was a combination of baby greens including mustard, mizuna, and other greens I couldn’t identify. I sautéed the greens with minced ginger and garlic as a bed for salmon fillets and shiitake mushrooms steamed in foil packets with an Asian sauce. Pea tendrils would have made the perfect garnish (as called for in the recipe), but we had already eaten them!
I’d never made anything with green garlic before, so I bought a few stalks when I picked up my share.
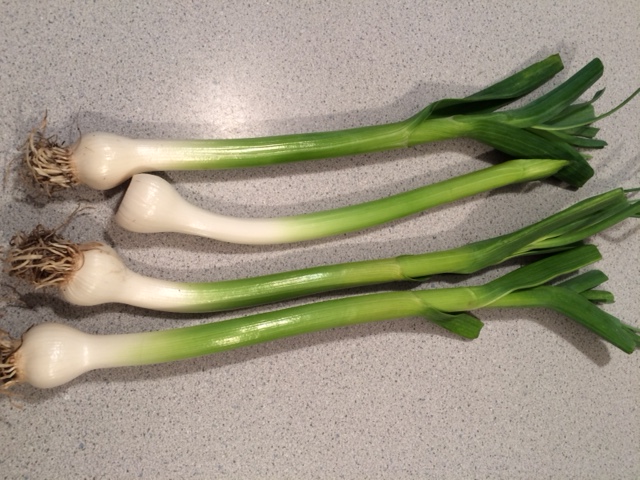
Green Garlic
When you slice through the bulbous end of the stalk, you can see the little cloves of garlic waiting to develop into garlic bulbs that are harvested at the end of the summer. The flavor is definitely garlicky, but with a milder bite.

If you look carefully, you’ll see tiny cloves ready to grow!
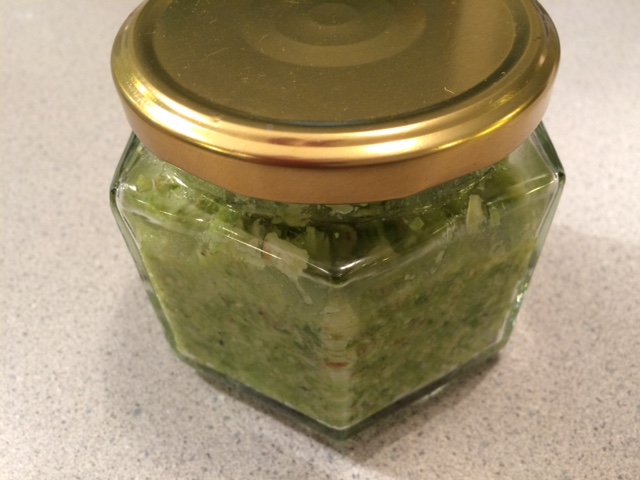
I added one stalk to the quiche. With the remainder, I made a green garlic pesto. I like garlic’s bite, but it could be mellowed by blanching the green garlic before making the pesto. The pesto is quite versatile. So far, I’ve used dollops of the pesto on pasta, mixed with mayonnaise to dress a potato salad, and as a condiment for pan-fried fish.
I’ll be picking up my next share later this week, so check back to see what I get and how we eat it!

1 oz sage (leaves stem, flowers), cut into 2-inch lengths, washed and dried
3 cups red wine vinegar
In a bowl, muddle the sage until it’s bruised and fragrant. Transfer to a clean 1-quart jar. Add vinegar and cover with lid, preferably plastic. (If your jar doesn’t have a plastic lid, cover the top with plastic wrap before closing with a metal one. The vinegar could react with the metal lid.)
Let it sit in a cool dark place for 1-4 weeks. Taste weekly. When you like the strength of the infusion, strain out the sage and transfer the vinegar to clean bottles.
Store at room temperature.
12 fresh mint leaves
1½ Tbsp fresh lime juice
2 Tbsp simple syrup (made with 1:1 sugar/water ratio)
1½ oz rum (preferable Bacardi Limon)
Ice cubes
Club soda or unflavored seltzer
Lime wedge
Mint sprig
In a tall glass, muddle mint leaves with lime juice. Add simple syrup. Fill glass with ice. Pour rum over the ice and top the glass with club soda. Garnish with a lime wedge and a sprig of mint.
Serves 1
2 oz pea tendrils, broken into 2-inch stems (leave any flowers – they’re edible)
2 radishes, sliced thin
Dressing:
1 Tbsp Dijon mustard
1½ Tbsp tarragon vinegar
¼ tsp capers, roughly chopped
½ tsp caper brine
3 Tbsp extra virgin olive oil
Leaves of 4 sprigs of tarragon, chopped
Salt & pepper to taste.
To make the dressing, combine all the ingredients in a small jar and shake well until combined. Taste for seasoning.
Toss the pea tendrils and radishes with the dressing. You won’t use all the dressing. Save it for another salad.
Serves 2.
4 stalks green garlic
25g chunk Parmesan, cut into a few smaller pieces
2 Tbsp almonds
¼ cup olive oil
Salt & pepper to taste
Cut the bulbous end off of the green garlic and cut it in half. Slice the remaining stalk into 1-inch lengths.
Place the Parmesan and almonds in a food processor and pulse until coarsely ground. Add the green garlic and pulse until chopped. With the food processor running, add the olive oil and process until the mixture forms a thick paste. Season with salt and pepper.
Store in the refrigerator.
2 Tbsp olive oil, divided
1 onion, thinly sliced
Pinch of salt
2-3 bunches of greens, thick stems removed, washed well but not dried
1 stalk green garlic, thinly sliced (optional)
4 eggs
1½ cups milk (skim or lowfat is fine)
4 oz crumbled blue cheese
Salt & pepper to taste
Pastry crust for 9-inch pan (your favorite recipe or mine)
Roll out the pastry crust to a 12-13-inch circle. Fit it into a 9-inch springform pan, going 2 inches up the side and folding the extra pastry over to reinforce the sides. Prick the crust all over with a fork. Cover with plastic wrap and chill for at least 30 minutes. Preheat the oven to 425F. Line the crust with parchment paper (or foil) and fill with pie weights (I use dried beans reserved for this purpose). Bake the crust for 15 minutes. Remove the parchment with weights. If any areas puffed up, prick them again with the fork to let out the air. Let the crust cool while you prepare the filling.
Reduce the oven temperature to 375F.
In a skillet, heat 1 tablespoon of olive oil over medium heat. Add the sliced onion and a large pinch of salt. Reduce heat to medium-low. Sauté the onion, stirring often, until it’s lightly golden, about 5-10 minutes. In a larger pan, heat another 1 tablespoon of olive oil over medium heat. Add the greens, in handfuls, to the oil. If the volume exceeds your pan, wait a minute or so until the greens reduce and you will have room to add more. Cover the pan, and let the vegetables cook down until they are completely wilted and cooked through. With tender greens like spinach and chard, this will take 2-3 minutes. Periodically taste them to see if they’re ready. Drain, pressing out excess liquid, and coarsely chop the greens. Combine with the onions and add sliced green garlic, if using. Season with salt and pepper.
In a bowl, make the custard by whisking the eggs and milk together. Season with salt and pepper.
Place the pan with the crust on a baking sheet. Spread the greens mixture over the bottom of the partially-baked crust. Sprinkle with blue cheese. Pour in the custard. Bake for 1 hour, until the top of the quiche is lightly browned and the center is set. Cool slightly before serving. Can be served warm or at room temperature.
Serves 6-8
Food Revolution Day 2016 {CtBF}
![]() Today is Food Revolution Day, so named by Jamie Oliver in his crusade to increase awareness about our food systems, globally, and to inspire children (and adults) to take charge of what they eat, starting with a simple revolutionary act: Learning to Cook! In support of this year’s Food Revolution Day theme “Feed the Future”, Jamie has created a set of 10 essential recipes that cover a wide range of cooking techniques to set any cook up for making some delicious meals and then serve as a springboard for variations as the cook’s confidence increases.
Today is Food Revolution Day, so named by Jamie Oliver in his crusade to increase awareness about our food systems, globally, and to inspire children (and adults) to take charge of what they eat, starting with a simple revolutionary act: Learning to Cook! In support of this year’s Food Revolution Day theme “Feed the Future”, Jamie has created a set of 10 essential recipes that cover a wide range of cooking techniques to set any cook up for making some delicious meals and then serve as a springboard for variations as the cook’s confidence increases.
My cyber-friends who have been cooking together since 2010, first with French Fridays with Dorie and now under the umbrella of Cook the Book Fridays, are joining forces today to make what we consider to be an essential French recipe from our current project book My Paris Kitchen by David Lebovitz. Can you guess what that recipe might be? Quiche!
I’ve been making quiche since early in my savory cooking career. When I look back in my first recipe card file book (which has served as a chronological history of my favorite things to cook from age 12 through college), it appears that I added quiche to my repertoire in the summer after my freshman year of college. I aimed high. My first favorite version was Julia Child’s Spinach Quiche (Quiche aux Épinards) from Mastering the Art of French Cooking. I doubt I made my own crust at the start, but I made spinach quiche over and over again. In fact, I still make this particular recipe from time to time.
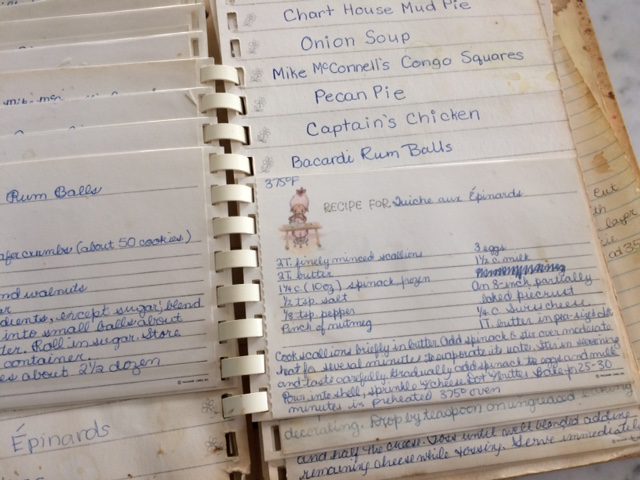
My First Recipe “Filebox”, started in 1973
Now I think of quiche as more of a formula than a recipe. I mix-and-match crusts, custards, and fillings depending on the season and what’s in the fridge. It’s a wonderful way to use up leftover cooked vegetables and other side dishes. Bind them with a custard and you have a filling lunch or dinner.
In honor of Food Revolution Day, we are making David Lebovitz’s version of quiche from My Paris Kitchen: Tarte Salée au Jambon, au Bleu, et aux Poires (ham, blue cheese, and pear quiche).
The recipe starts with a sturdy crust made with standard ingredients (flour, butter, salt) plus cornmeal and egg. I usually make my pâte brisée in the food processor, but this crust mixed up easily in a stand mixer. I liked that the crust didn’t require pre-baking, though it wasn’t as flaky as the other crusts I use for quiche.
The custard was INCREDIBLY rich. My usual formula combines eggs and milk (sometimes skim). David’s recipe combined cream cheese and heavy cream with a combination of whole eggs and egg yolks. Wow was it decadent! Once baked it had a silky texture and practically melted in your mouth. This rich custard isn’t something I could justify indulging in every week, but I would pull it out for special occasions.

Tarragon Leaves mark “my” half of the quiche, the half WITH pear
As for the filling, sautéed shallots, diced ham, crumbled blue cheese, diced pear, and a generous amount of minced tarragon (fresh from my garden) added substance to the mix. Any of you familiar with my husband Howard’s rules about when he’ll eat fruit might wonder how I handled this recipe. David said the pear flavor wasn’t strong, but if noticed, I didn’t want Howard to have to come up an alternate meal on the fly. Aren’t I nice? I combined all the ingredients except the pear and added them to the pan. Then I marked halves of the quiche with tarragon leaves and gently stirred the diced pear into one half of the quiche. His and hers!
This deep-dish quiche is a keeper. As I mentioned, the custard isn’t for every day, though I might take inspiration from the ham and cheese combination to add to a lighter custard.
For anyone trying to round out their culinary skills to feed themselves in the future, quiche is a “must know” kind of recipe. This recipe is a really good version to start with. The crust is manageable, even for a beginner, and the end result is a hearty and delicious meal.

I served slices of quiche with a white bean salad on the side. A green salad would also be a good accompaniment. The vinaigrette on the salad will help cut the richness of the quiche.
If you want to take your quiches to the next level, try this recipe on page 155 of My Paris Kitchen. To find out more about my friends’ quiches, check out their links here.
