Pork Rillettes

Last year, I went with my friend Lauren on an excursion to Cheese Mecca, Formaggio Kitchen, in Cambridge, Massachusetts. Lauren wanted to get a round of Vacherin-Mont d’Or. I tagged along because I love any excuse to visit that store and seldom seem to get there on my own.
I bought a small assortment of domestic artisan cheeses. At this point, I can’t remember which ones. In addition to several cheeses, Lauren also bought a jar of house-made pork rillettes. Since then, I have wanted to make some at home.
Recently, Howard brought up the idea of rillettes. I can’t remember why, but he (we?) probably ate them at a restaurant this winter. I looked up recipes and found that most of the ingredients are pantry items, except the meat, of course, and the steps were simple, as long as you had time on your hands. A snow day when it looked like we’d be housebound, I made sure we had a Boston butt (pork shoulder) on hand, and the day offered the perfect opportunity.

About to go in the oven
Pork rillettes is what the French call potted pork. Pork is slowly cooked until it is falling apart. First, you place the pork shoulder in a pot of water, bring it to a boil, drain and rinse. This is to remove blood and other impurities before proceeding. Then, you put the pork back in the pot, with the aromatics, and water, bring it to a simmer, and put it in the oven for 4 to 6 hours.

Falling apart after hours in the oven
The shreds of meat, along with the flavorful cooking broth, are beaten together to form a pâté. The rillettes are packed into ramekins or jars and sealed with fat. Ideally, freshly rendered pork fat is used. I had trouble sourcing fatback and because of the additives, I didn’t want to use commercial lard. Instead, I salvaged the fat that came to the top when I cooled the extra cooking liquid and made up the difference with a jar of clarified butter (ghee) from Trader Joe’s.
Bella, always begging for an extra treat, was allowed to enjoy the meat that stuck to the fat topping. I melted the fat disks in the microwave and crumbled the meat into her bowl. A little bit mixed in with her kibble = an empty bowl. Dogs are so predictable.
This was a successful experiment! You do not season the rillettes with salt and pepper until it’s time to make the paste. I did underseason the rillettes this time. It needed a lot more salt, but, for this batch, that’s a problem easily remedied as it’s eaten. Rillettes make a hearty appetizer on crackers or baguette slices and topped with sliced cornichons. Elegance on a budget. It is wonderful on a platter with French cheese (or not).
Pork Rillettes
Adapted from Charcuterie by Michael Ruhlman and Brian Polcyn
1 large leek, split in half lengthwise ALMOST to the root, and washed well
1 small bunch of thyme
3 bay leaves
1 celery stalk
8 black peppercorns
1 medium onion, peeled and studded with 5 cloves
3 lbs boneless pork butt, fatty is good
Kosher salt
2 quarts water
Freshly ground pepper to taste
Make a bouquet garni by sandwiching the thyme and bay leaves inside the leek. Bundle the leek and celery and tie together with cotton kitchen string. Crack the peppercorns with the side of a knife or the bottom of a heavy pan and place them in a tea ball.
Preheat the oven to 300F.
Place the pork in a large pot and cover with water by 2 inches. Bring to a boil, then drain pork and rinse it. Place the pork back in the pot along with the bouquet garni, peppercorns, onion, 1 Tablespoon salt, and 2 quarts of water. Bring the pot to a simmer, then cover, and put it in the oven. Cook until the meat is falling apart and tender, 4 to 6 hours.
Remove the pork from the pot and let it cool to just above room temperature. DO NOT DISCARD the cooking broth. Strain the liquid.
Set up your stand mixer with the paddle attachment. Coarsely chop the pork into 1 to 2-inch chunks (it’s OK that it’s falling apart), and add to the bowl. Mix on low speed, gradually adding enough of the reserved cooking liquid, until the mixture becomes a moist spreadable paste. This will take a minute or two. Generously season with salt and pepper to taste.
Pack pork mixture into ramekins or straight sided jelly jars (4oz size or 8 oz wide-mouth work well). Refrigerate until chilled.
Chill any leftover cooking liquid too. If any fat comes to the top, you can use this to seal the rillettes. Otherwise, use other rendered pork fat if you have any or clarified butter (ghee).
Seal the rillettes by heating the fat to melt it. Pour a thin layer of fat ( 1/8-inch) over the rillettes to seal. Store in the refrigerator.
Best served at room temperature (which could take 2 hours after removing from the refrigerator). Consume within 2-3 weeks.
butter and rum crepes, fancy and plain {ffwd}
When I was in high school, my mother (the gadget queen) had an electric crepe maker. You plugged it in, dipped the surface in the batter, and when the crepe was browned, you pulled it off. I remember being obsessed with making crepes, mostly savory dishes, filled with (now) retro fillings like tuna and chicken mixed with mayonnaise and topped with lots of cheese.

My Recipe Cards from the late 1970’s
Last year (I think), my sister Jennifer bought a crepe pan and declared crepes to be her new holiday signature dessert. Was it for New Years’, Jennifer? I don’t recall ever making sweet crepes though. Until now. This week’s recipe for French Fridays with Dorie is Butter and Rum Crepes, Fancy and Plain.
The batter is what you might expect for pancakes (milk, eggs, flour, melted butter) with some flair (sugar rubbed with citrus zest, dark rum and Grand Marnier). It needs to rest, so I made in the day before I wanted to make the crepes.
I’ll admit that I’m not very good at making regular pancakes. That’s Howard’s job (I was fired years ago). Making crepes is a bit more difficult. I had a hard time figuring out the right amount of batter to pour in and swirl around to get full coverage. I finally settled on using a quarter-cup measure, not quite filled, to scoop from the batter bowl and pour into the pan.

I used the non-stick skillet I use for omelets. Its sides are a bit high and sloping which made it hard to loosen the crepe for turning. A flatter pan might have been worked better for me. I found a rubber spatula worked well to separate those lacy bits from the pan before gently grabbing the edge to flip it over. You definitely need Nonna fingers for this one (that’s those experienced fingers that grandmothers have that don’t feel the burn of touching hot food). It took me most of the batch to get the technique down and feel comfortable. At least the mistakes were tasty.

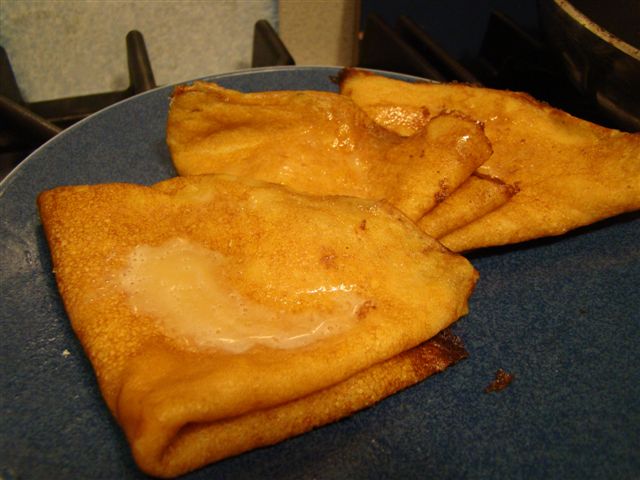
Dorie suggested leaving the crepes plain (well, they are sprinkled with sugar, so not quite plain) or filling with lemon curd. I had a jar of lemon curd in the fridge, so I didn’t make it from scratch, though I do highly recommend the Lemon Curd recipe in AMFT. For variety, I filled some and left some plain.
To top off the dessert, Dorie gives a recipe for a warm honey-citrus sauce. What are you doing with your leftover sauce?
I liked the crepes. I certainly need more practice to be able to make these with confidence. Miraculously of all, Howard said he wanted a plateful of crepes. Go figure. There isn’t any component of this recipe that I would have predicted he would eat. He said “it was alright”. I don’t know if that’s the truth, or if he’s just gaslighting me.
To see how my Dorista friends made out, check out their links here.
